

A cat eye is my general day to day makeup thing - I've worn it for years, and I've pretty much completely mastered every style of liner by now. And yet... We all know the following scenario. You line one eye - it looks great, you're mightily impressed with yourself. You start on the second eye. You feck it up, and subsequently spend twenty minutes trying to redo it while swearing under your breath and kicking things.
Everyone - even those of us who can get a perfect liner on an eye un thirty seconds - have days when it just won't work. If the brush isn't clean enough or your pot of liner is old, then clumping and blobbing will happen. On the days when my liner efforts go right to hell, I make the mess into a makeup look. Here's how to create a nice warm smoky eye, and then add (or fix) your liner on top!
Step One
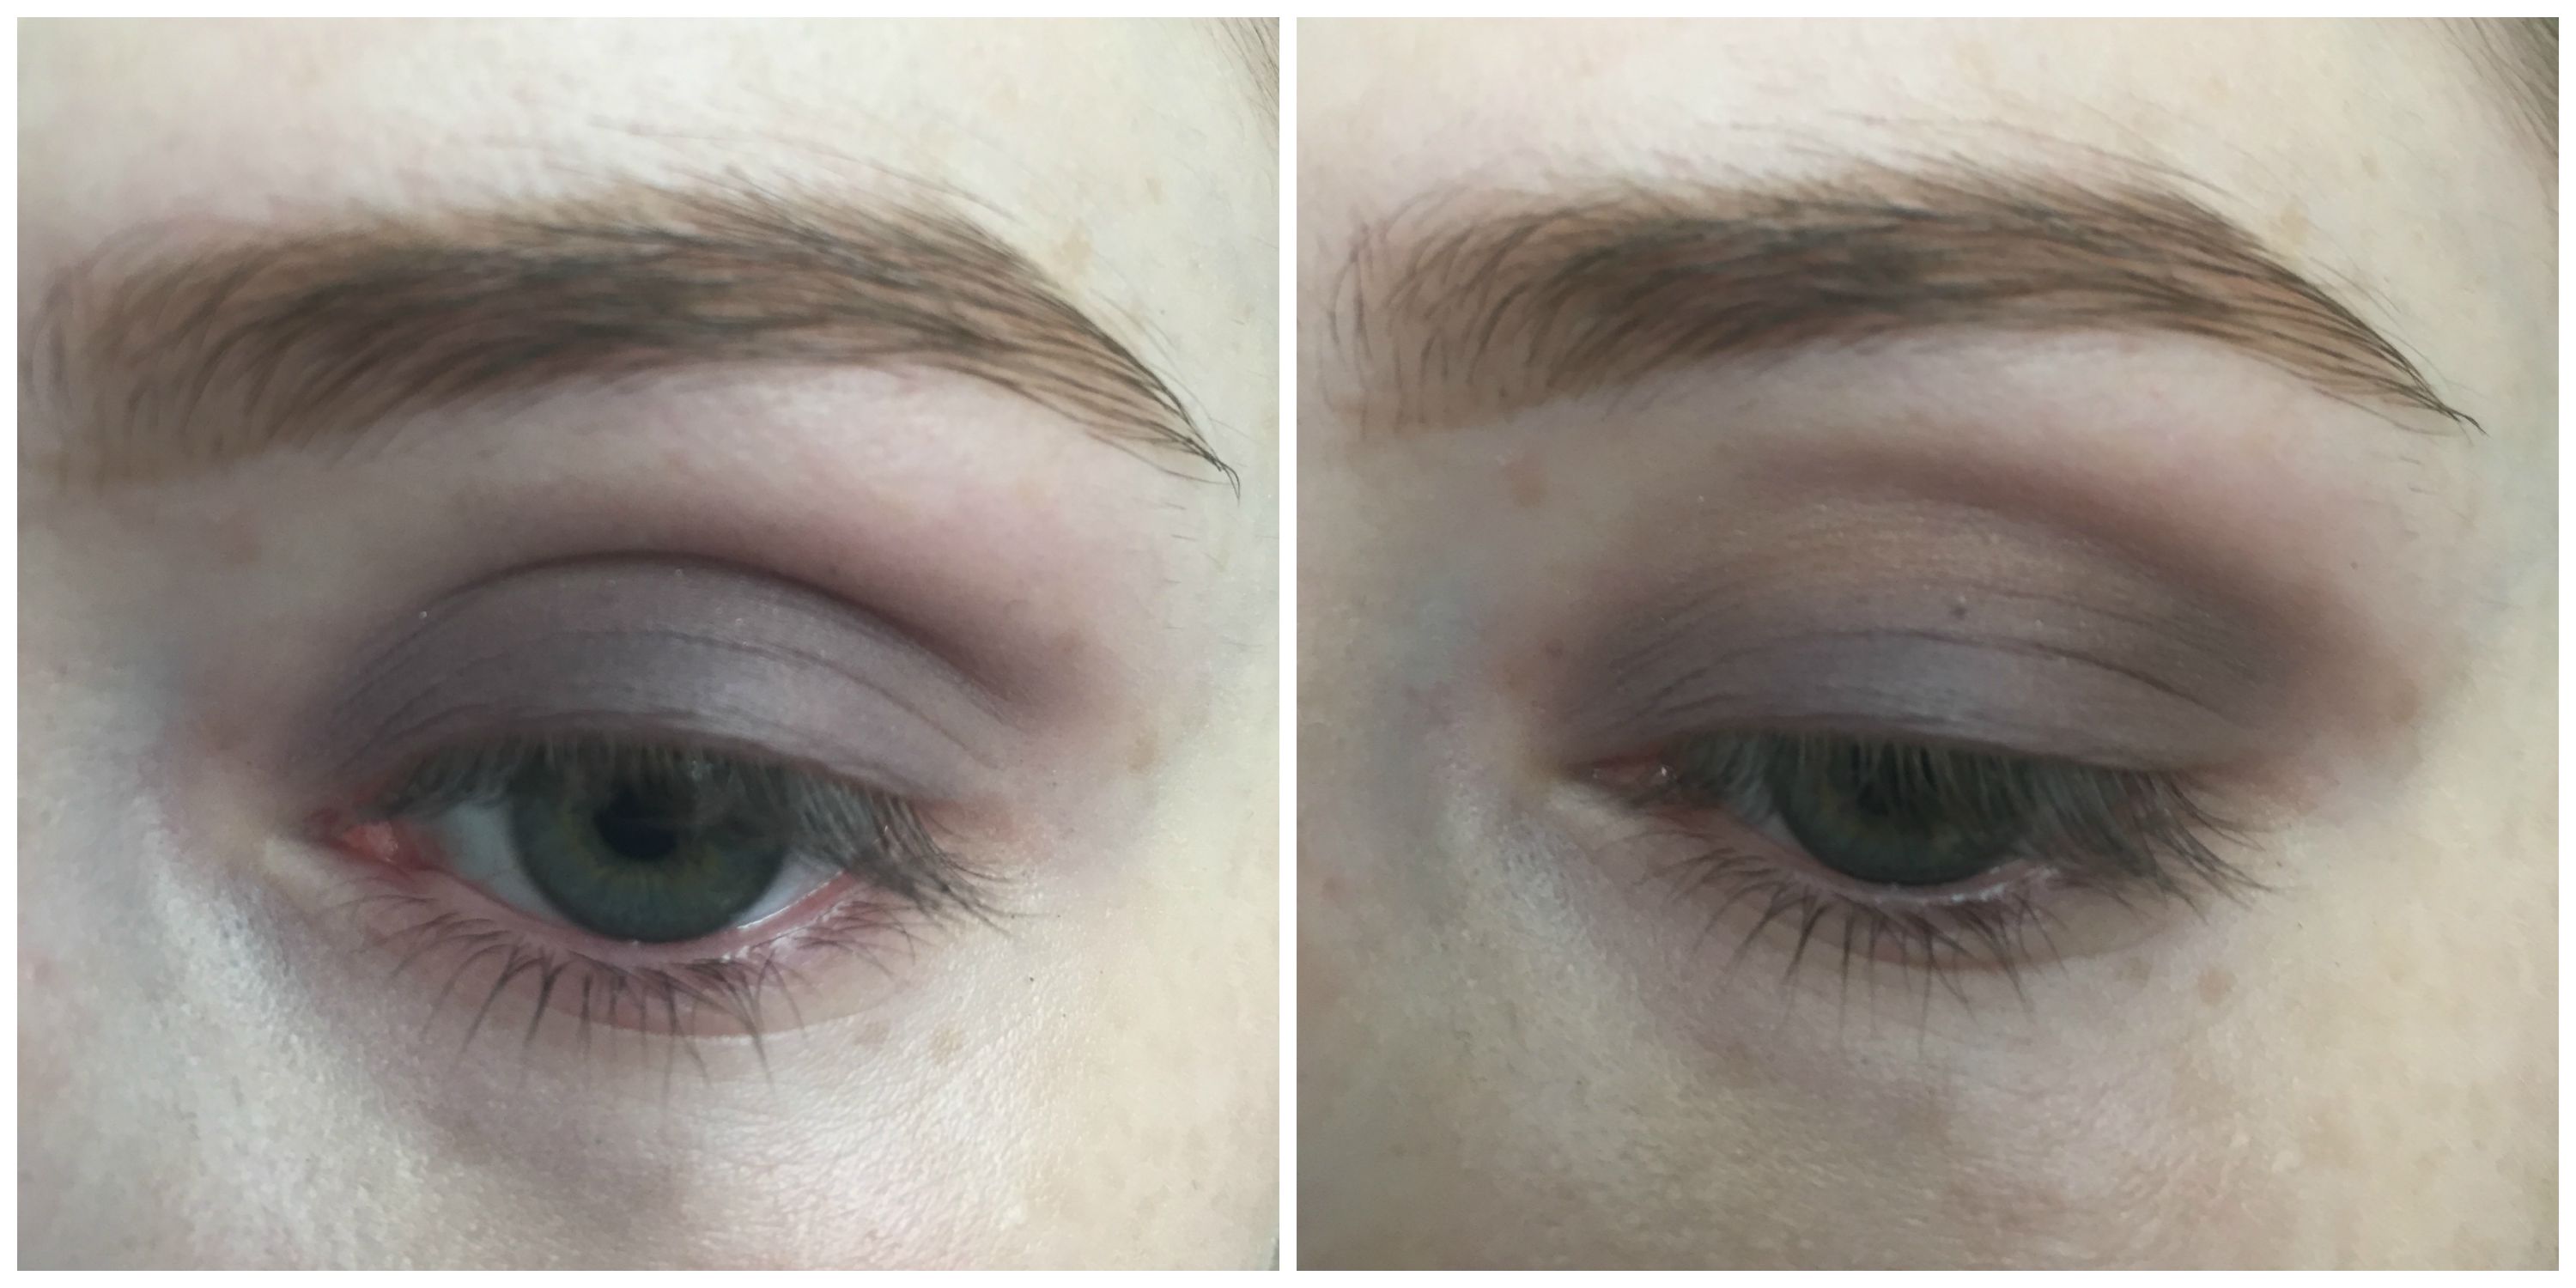
- Apply your usual foundation as normal, and then tidy brows (if they need it). Ive filled mine in with Clarins Eyebrow Pencil in Light Brown.
- Next, to the eyes - since the weather has been nice, I opted for the Urban Decay Naked 3 Palette. The new smoky one is lovely, but I'm not whipping that out till autumn (to cheer myself up when the rain starts again...)
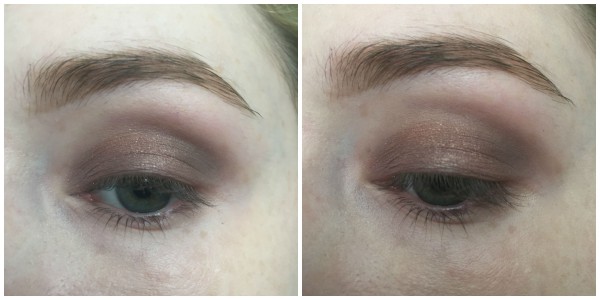
- Start with a cream shadow as a base, so that your powders will sit better. I'm using Clarins Ombre Matte in Heather. It's a gorgeous cool toned mauvey brown, which contrasts the warmth of the Urban Decay Palette beautifully. Apply this all over the lid with your ring finger, and blend the edges with a clean fluffy brush.
- Next, whip out your palette, or any warm nude to brown shades you have.
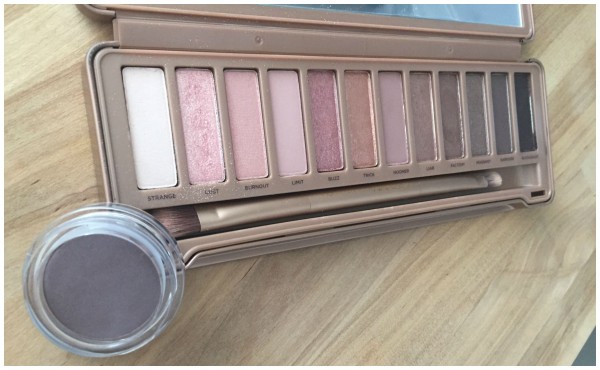
- Dust some of Mugshot - the fourth from last shade in the above photo - though the crease of the eye, just to blend the Heather a bit and add some nice chocolatey warmth.
- To make this look suitable for daytime and bridal, I'm keeping the undereye area clean - so no shadow under the eyes, or you'll quickly have yourself a (really nice) night time look.
Advertised
Step Two
- Get some amber metallic shadow - I'm using Trick from the palette - and dab it on the centre of the lid, before dabbing Strange - a matte bone colour - into the inner corner, just to open up and brighten the eye area.
Step Three
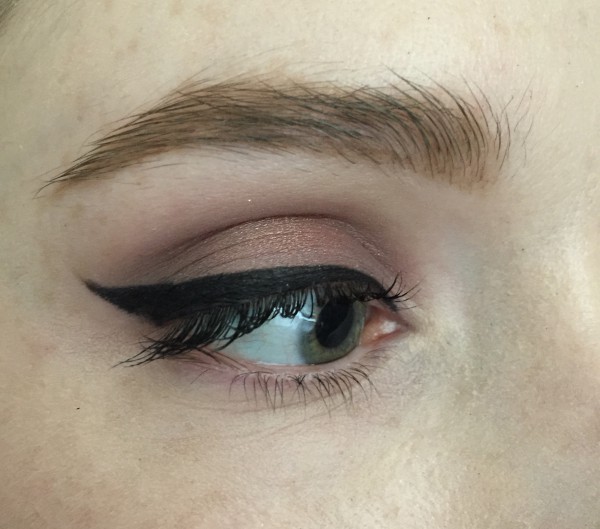
- If you want to minimise the chance of making a mistake, make sure your brush is squeaky clean and doesn't have any clumps of dried liner residue in it. Also, if your liner is old, warm it up before you use it. You can put the whole pot of gel (with lid closed tight) into a bowl of warm water, or take a generous amount out of the pot, and warm it on the back of your hand.
- Start lining - use this handy tutorial if you need a bit of help. If you make a blobby error along the way, thicken your liner to cover the blob and compensate. If you make a mistake away from the main liner (like accidentally get a dot of liner on your lid), wait for it to dry, and roll it off with a dry cotton bud. If there's lots of mess, clean up with micellar water on a cotton bud. You can also sharpen or change your flick with one of these. Take your time - any mistake can be cleaned up or disguised.
- Im making this flick a touch more dramatic than usual - it rather thick at the outer corner, and curves up at the tip like a witch's shoe. Do whatever flick you're comfortable creating, but the longer, curved flick adds a touch of drama.
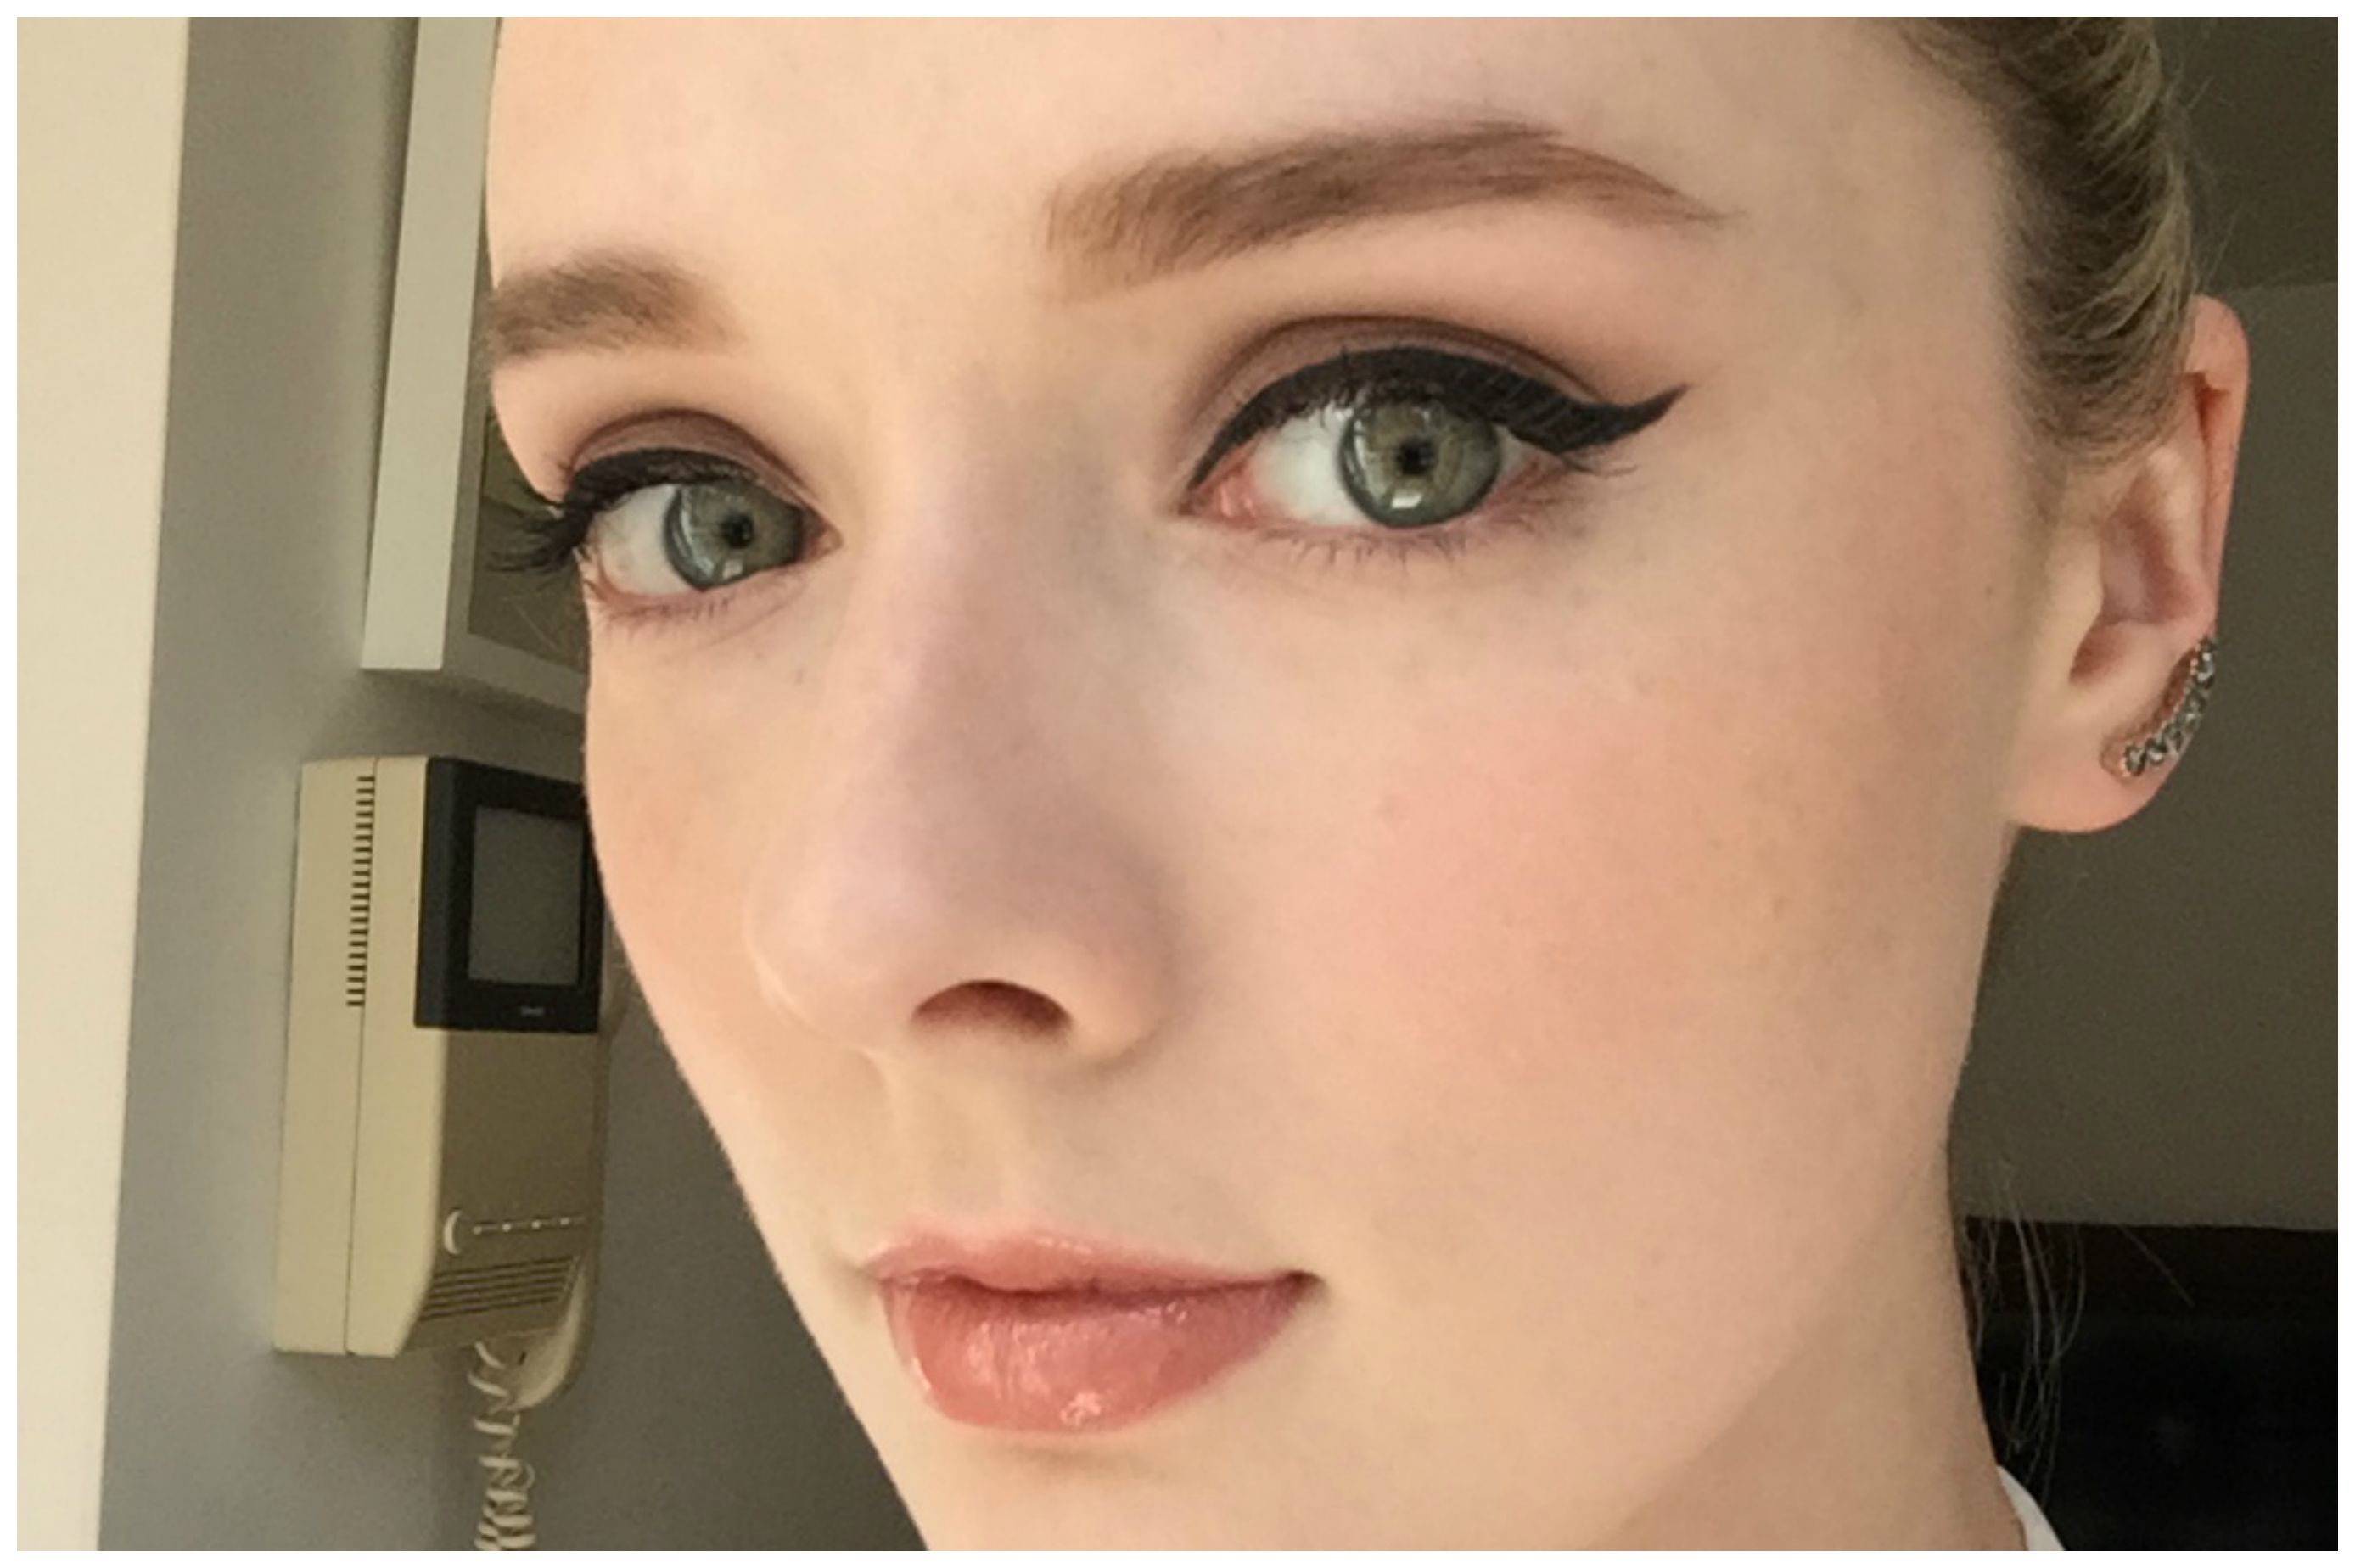
The finished effect is strong, without being too much for day. The lipctick I'm wearing is Mac Huggable Lip Colour in Soft Talkin'.
Do you ever have a flick go horribly wrong? Do you think this is a wearable day look? Share your thoughts in the comments below!
Advertised

