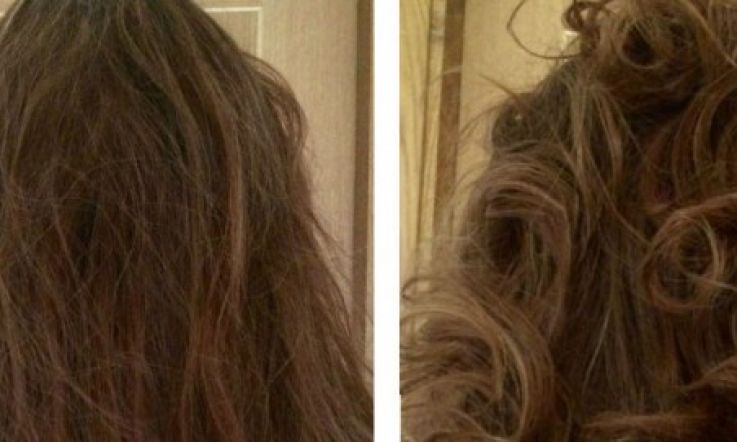
You Can Do It! The DIY Curly Blow Dry

While I love the indulgence of visiting a salon and having the whole relaxing experience, funds and time do not always allow for these little luxuries. So when I need to, I turn to this technique to replicate the curly blow dry look. I’ve perfected it through trial and error and am pretty happy with the results that I can achieve. I hope that some of you find it useful.
At a bare minimum all you need are hair grips and a curling tongs but I also like to use a heat protection styling spray and hairspray. L’Oreal Elnett are my products of choice. Personally I like to use the Babyliss Big Curl but any tongs are fine.
- Start with clean and dry hair. As you’ll see my hair has a bit of a natural wave in it anyway and is fairly thick.
- Put it up into a high ponytail and then take out a small section at a time.
Advertisement
- Spray the section with the heat protection spray and then wind it around the tongs. Hold for a few seconds and then release.
- When the curl is hanging down, catch it in the palm of your hand and lift it back up towards your scalp. Then secure it in place with a hair grip so that the curl is tight against your head.
- Continue in this way until all of your hair has been sectioned, curled and pinned. It generally takes me about 20mins approx.
- Once all of the hair is in place then spray it with hair spray and leave it as long as you can. The longer you leave it pinned, the longer the curl will last when it’s taken down.
- I only left it for about 10 minutes this time but when I can, I like to leave it for at least an hour or two.
- Take out the hair grips when you are ready to go, tip your head upside down and give the hair a loose shake through. Then give it once last blast of the hairspray to retain as much of the curl as possible.
So what are your hair tips and tricks for recreating salon looks at home? Will you be trying out this tried and tested technique? Share your time and money savers in the comments!