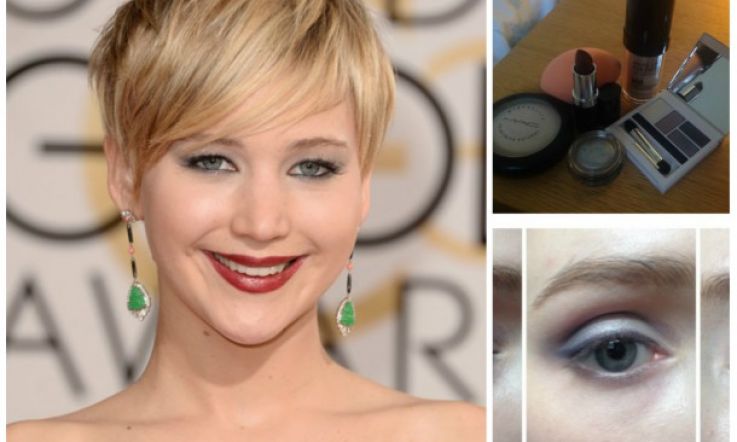
Jennifer Lawrence Golden Globes Makeup: A Step-by-Step Guide

Jennifer Lawrence is everyone's favourite girl crush. She's pretty kickass, is as sassy as they get, and seems to say exactly what she thinks. She also seems to look AMAZING on every occasion.
But her makeup at the recent Golden Globes raised some (well groomed) eyebrows. When I saw it, rather than uttering the usual effusion of 'oohs', I stopped for a moment and considered. The makeup was eye-catching, interesting, but perhaps difficult to wear, unless you're Jennifer Lawrence...
So I set out to recreate the full-on look to see how wearable it really is.
Step One
- To achieve the full, even coverage of this look, I'm using Make Up For Ever HD Foundation in N110. I'm patting it on with a Real Techniques Miracle Complexion sponge for an airbrushed finish, then concealing any obvious blemishes .
- Since the brows are fair and understated, I'm applying some Mac brow pencil in Fling in small strokes through my brows.
- To prime my eye and add colour in one step, I'm using a silver cream shadow. I'm dabbing Lancome's Hypnose Doll Eyes Dazzling and Fresh Eyeshadow in Diament Argenté onto the lid as well as running it under my eye.
Advertisement
- I'm using the Clarins Cotton Flower Eye Shadow Quartet because the colours suit this look. It is a bit of an oldie, and was limited edition, but any white, mid-grey and dark grey metallic colours will do.
- Take the mid-grey shade and, with a flat shadow brush, pat it onto the outer third of the eyelid and along the crease of the eye, almost to the inner corner. Then take a clean blending brush and blend the shadow to soften the edges.
Step Two
- Using the same flat shadow brush, take a little of the dark grey shadow and pat it onto the outer corner of the eye in a winged out V shape. Also run the shadow under the eye, and along the crease.
- Grab your fluffy brush again and blend everything until there are no harsh edges.
- Next, grab an angled brush and create a soft flick by lining the eye with the same dark grey shadow. Don't wing it out too dramatically - just a little. Keep dabbing to build up the liner
- When you're happy with your line, take your favourite black pencil liner and apply it softly along the upper lashline, just to intensify the darkness at the base of the lashes.
- With a clean flat shadow brush, pat the iridiescent white shadow along the browbone all the way up to the eyebrow. You need to take the white right in toward the bridge of the nose too. The white is applied in a way that's very reminiscent of '80s makeup, and makes the overall look more extreme. If you're freaked out by this, skip the white shadow altogether!
Step Three
- Run your black liner along the upper and lower waterline to add more drama to the eye and apply a few coats of your most hardworking mascara.
- Obviously, in the original look, Jennifer is wearing false lashes. I'm skipping them, however, to tone down what is quite an extreme look. If you're feeling brave, then by all means apply some super-long lashes!
- Since the eye and lip are so full-on, the blush is minimal. I'm applying some of Mac's Well Dressed blush - a subtle pink - to the apples of my cheeks and taking it back along the cheekbone toward the hairline to provide some very soft contour.
- Next comes the lip! Jennifer's makeup for this look was all Dior, and though the shade of her lipstick looks different in different photos. the colour she actually wore was a Dior lipstick called Prune Daisy. However, in the interest of your pocket, I'm using Rimmel's Lasting Finish Lipstick in Starry-Eyed. I'm not bothering with liner, but applying the lipstick to moisturised lips with a square lip brush for a clean finish. I apply a layer, blot the lips on a tissue, then apply another layer to increase longevity.
- To finish the look, I need to matte down the skin to soften the finish. I'm applying a light dusting of Mac's Mineralise Skinfinish Natural in Light. This makes the skin light reflective but not shiny.
What do you think of this look? Would you try it, or do you think it's just too fussy to wear?