Beaut.ie How To: The Hunger Games Manicures

Assuming that you haven't given up all interaction with the outside world for Lent, you'll have heard about The Hunger Games, which Himself and I went to see on Monday night. (Neither of us had read the books; we both really enjoyed the movie; Himself upended his drink onto himself at one point when something happening on screen caused him to jump. Good times!)
There's plenty for beauty buffs to savour throughout the flick - the outrageous and sometimes grotesque hair and make-up of residents of the Capitol, heroine Katniss Everdeen's many braided 'dos - while Effie Trinket's bling-encrusted talons will have nail nerds swooning into their popcorn with delight.
Here's how to nail Effie's look at home.
Magenta/fuchsia nails with gold gradient tips (as seen during the Reaping in District 12, top pic)
Advertisement
- Apply a base coat to prevent staining and extend wear time. I like CND Stickey
- Apply one-to-two coats of a magenta/fuchsia polish to achieve opaque coverage. Here, I've used Rimmel 60 Seconds in Fast & Fuchsia, which looks pretty well identical to what was used on Elizabeth Banks but it turns out is a bit of a nightmare to photograph
- Use an old cosmetic sponge to dab on a gold polish like this one from H&M onto the top half of the nail, concentrating coverage at the tips to achieve a gradated effect. You may find it easiest to sponge on two-to-three thin overlapping layers of gold to get that build up of product, initially covering the top half of the nail, then the top quarter, and finally just the tip
- If desired, add a layer of fine gold glitter polish
- Seal with top coat to seal and add shine
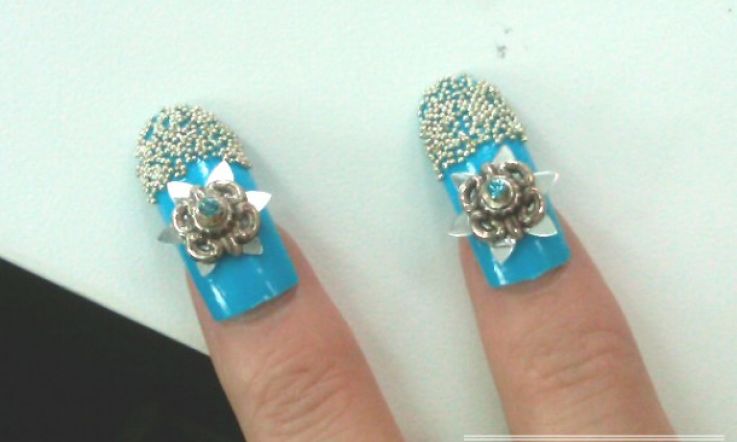
Turquoise nails with silver accents (as seen in the post-training scenes)
- Apply base coat.
- Follow with one-to-two coats of a bright blue polish; I went with Barry M Blueberry Ice Cream
- At this point, you have a couple of options to achieve an Effie-esque look. However, since I know most of you won't have easy access to tiny silver nail art balls and 3D decorations as seen on the originals above, I recommend drawing inspiration from the design rather than replicating it outright and adding simple silver detailing to the tip of the nail. For this, you could sponge on a silver polish using the method outlined above, or layer on a silver glitter, or use a fine dotting tool/ballpoint pen to create a ball-like polka dot effect (read my polka dot nail tutorial for more on that)
- Finish with top coat - and may the odds of your paint job staying put be ever in your favour