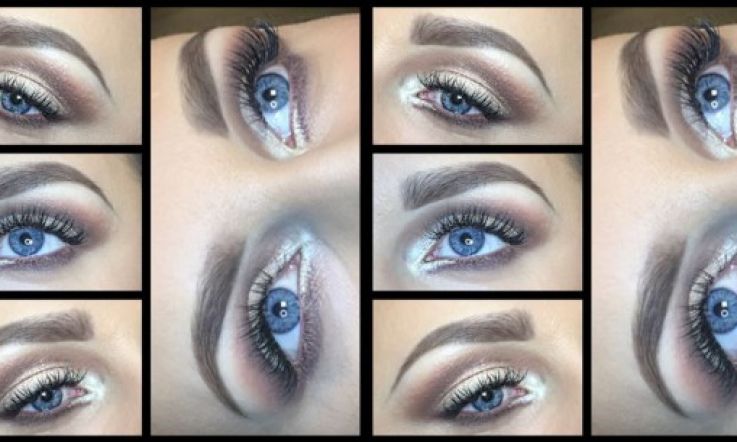
Get The Universally Flattering Ellie Goulding MAC Look

Having been given MAC's new Ellie Goulding palette to try out, my gut instinct was to bring it into my studio and use it on all my clients; the colour range in the eyeshadow quad is possibly one of the most complimentary colour choices for most eye colours.
If you missed our sneak peek of this product line you can catch up here.
The palette I used to create this look is: Halcyon Nights €55. Any warm or pink toned eye shadow will make a blue or green eye really stand out. Brown eyes can wear anything, so this palette is the ideal choice for most eye colours.
This includes:
- Starry-eyed eye shadow cream high pearl (frost)
- You my everything eye shadow mid-tone peachy brown (matte)
- Hanging on eye shadow muted plum-brown (satin)
- Saddle eye shadow golden orange-brown (matte)
- This love cream colour base pinky orange (pearl)
Advertisement
The look I created here, which I'm going to talk you through, was for one of my client's Christmas Party. It's a really easy look to achieve and perfect for the party season. So if any of you invested in or received the Ellie palette this Christmas, then you'll enjoy this.
If you didn't get the Ellie palette, you can use similar eyeshadow colours in its place.
- Step 1
It's most important to base your eyeshadow with a primer or heavy duty concealer, this is so the eye shadow will have something to grab on to. With all my eye looks, I conceal under the brow bone, and above the brow, and apply a paint pot on the lid and below the lower lash line.
- Step 2
With a slanted brush and a matte brown eyeshadow, fill in the brows keeping the proportions 2/3rds (up to the arch) to 1/3rd (arch to end) and comb it through with a spoolie so it doesn't look drawn in. If you want to learn more on the perfect shape brow you can catch up here.
Advertisement
- Step 3
With your slanted brush and the darkest brow shade, follow the lower lash line from just below the tear duct. Extend it slightly out from the bottom lash line and upwards towards the tail of your brow.
- Step 4
Take your flat brush next, (if you missed all the brushes you need to create the perfect eye makeup look, you can catch up here) and looking down into a mirror that's balanced on your knee, follow your natural socket line still using the darkest colour in the palette.
- Step 5
With your fluffy or blending brush, take the bottom left colour (saddle) and blend out the top and bottom of the eye makeup. The majority of the colour should be applied in the crease, and with the remaining product on the brush circle clockwise and anti-clockwise up towards the brow, and lower lash line.
- Step 6
With your flat brush, apply the cream colour base onto the lid. Clean off the brush and use the same brush to pat on starry-eyed (top left colour) into the lid. Bring some of the shadow right into the inner corner of the eye or tear duct. The colour will be different as it has not been 'based' with the cream colour base.
- Step 7
Finally, apply false lashes. If you missed my tutorial of how to apply them you can check it out here.
And there you have it. Why not try it at home, and if you have any questions please feel free to ask me by commenting below. I will be doing more videos after Christmas so if this look is one you want to see please let me know!