Beaut.ie How To: The Bling Accent Nail

Last week's post about my sparkly statement nail drew lots of mostly favourable comment, together with a "How To" request from Glamazon via the magic of Twitter. "Any chance of a step-by-step for the mani-challenged on those fab nails?" she wondered. Sure thing, sez I, only too happy to have an excuse a reason to play with bling again.
I got four full days out of the original manicure, by the by, just topping up any tipwear as it appeared, and by then I was hanging for a new paint job anyway. Removal was easy peasy: I just soaked some cotton wool in nail varnish remover and let it sit on the bejewelled nails for a few minutes before wiping them clean.
Doing them isn't that difficult, either. Honest. A bit fiddly, maybe, but that's it. If you're thinking of giving this a whirl but want more info, read on for the blow-by-blow guide!
1. Gather everything you need in one place and lay it out ready for use.
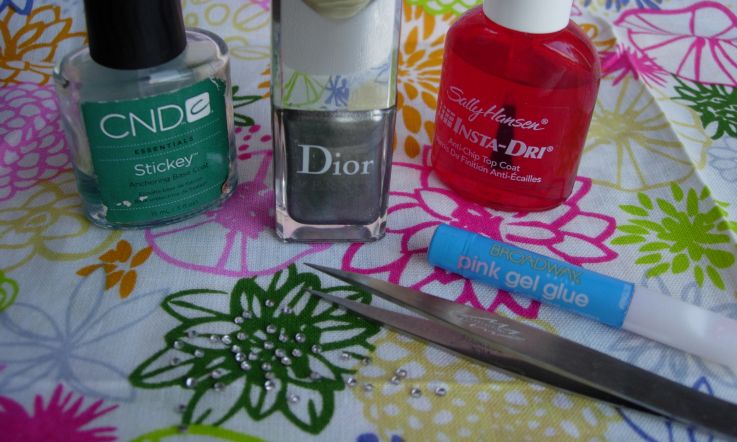
Using glue means there's a pretty high probability of sticking to everything you touch if you have to toddle off mid-mani to retrieve any equipment. My kit consisted of a base coat, nail varnish, pointed tweezers, a tube of nail glue, a pile of mini flat-backed crystals, and a top coat.
2. Paint your statement nail as normal with a base coat and one coat of colour.
Advertisement
It doesn't really need to be totally opaque since you're about to cover it in bling and there won't be much of the colour on display.
3. Make a small pool of glue, pick up a crystal with your tweezers, and dip the base of the crystal in the glue before applying it to the nail.
I used the flat end of the tweezers to press the crystal down onto the nail to be sure it stuck. Whatever you do, don't make the mistake of absentmindedly using your fingers!
Repeat until the nail is covered. I worked in lines for a tidy finish, so started with a line of crystals down the middle of my nail working from base to tip, then did either side in line with the crystals of the first row, then just staggered the outer edges.
4. Finish with a layer of top coat. Now, this is optional. I didn't actually put a top coat on mine until Day 2, because I was reluctant to do anything that might diminish the sparkliness of the crystals, but I do think it contributed to their staying power. They were still very bling-y, in fairness, but it definitely did detract from their faceted look.