

We've tackled quick and easy looks as well as more complicated, time consuming ones so far in the Get Ready With Beaut.ie series. It's not quite Halloween yet - check in next week for a special seasonal makeup look when I'll be making every effort to spook you.
'Tis the season, though so regardless of what you might be doing tonight, here's a rather brave vampy makeup look which is bound to draw attention! 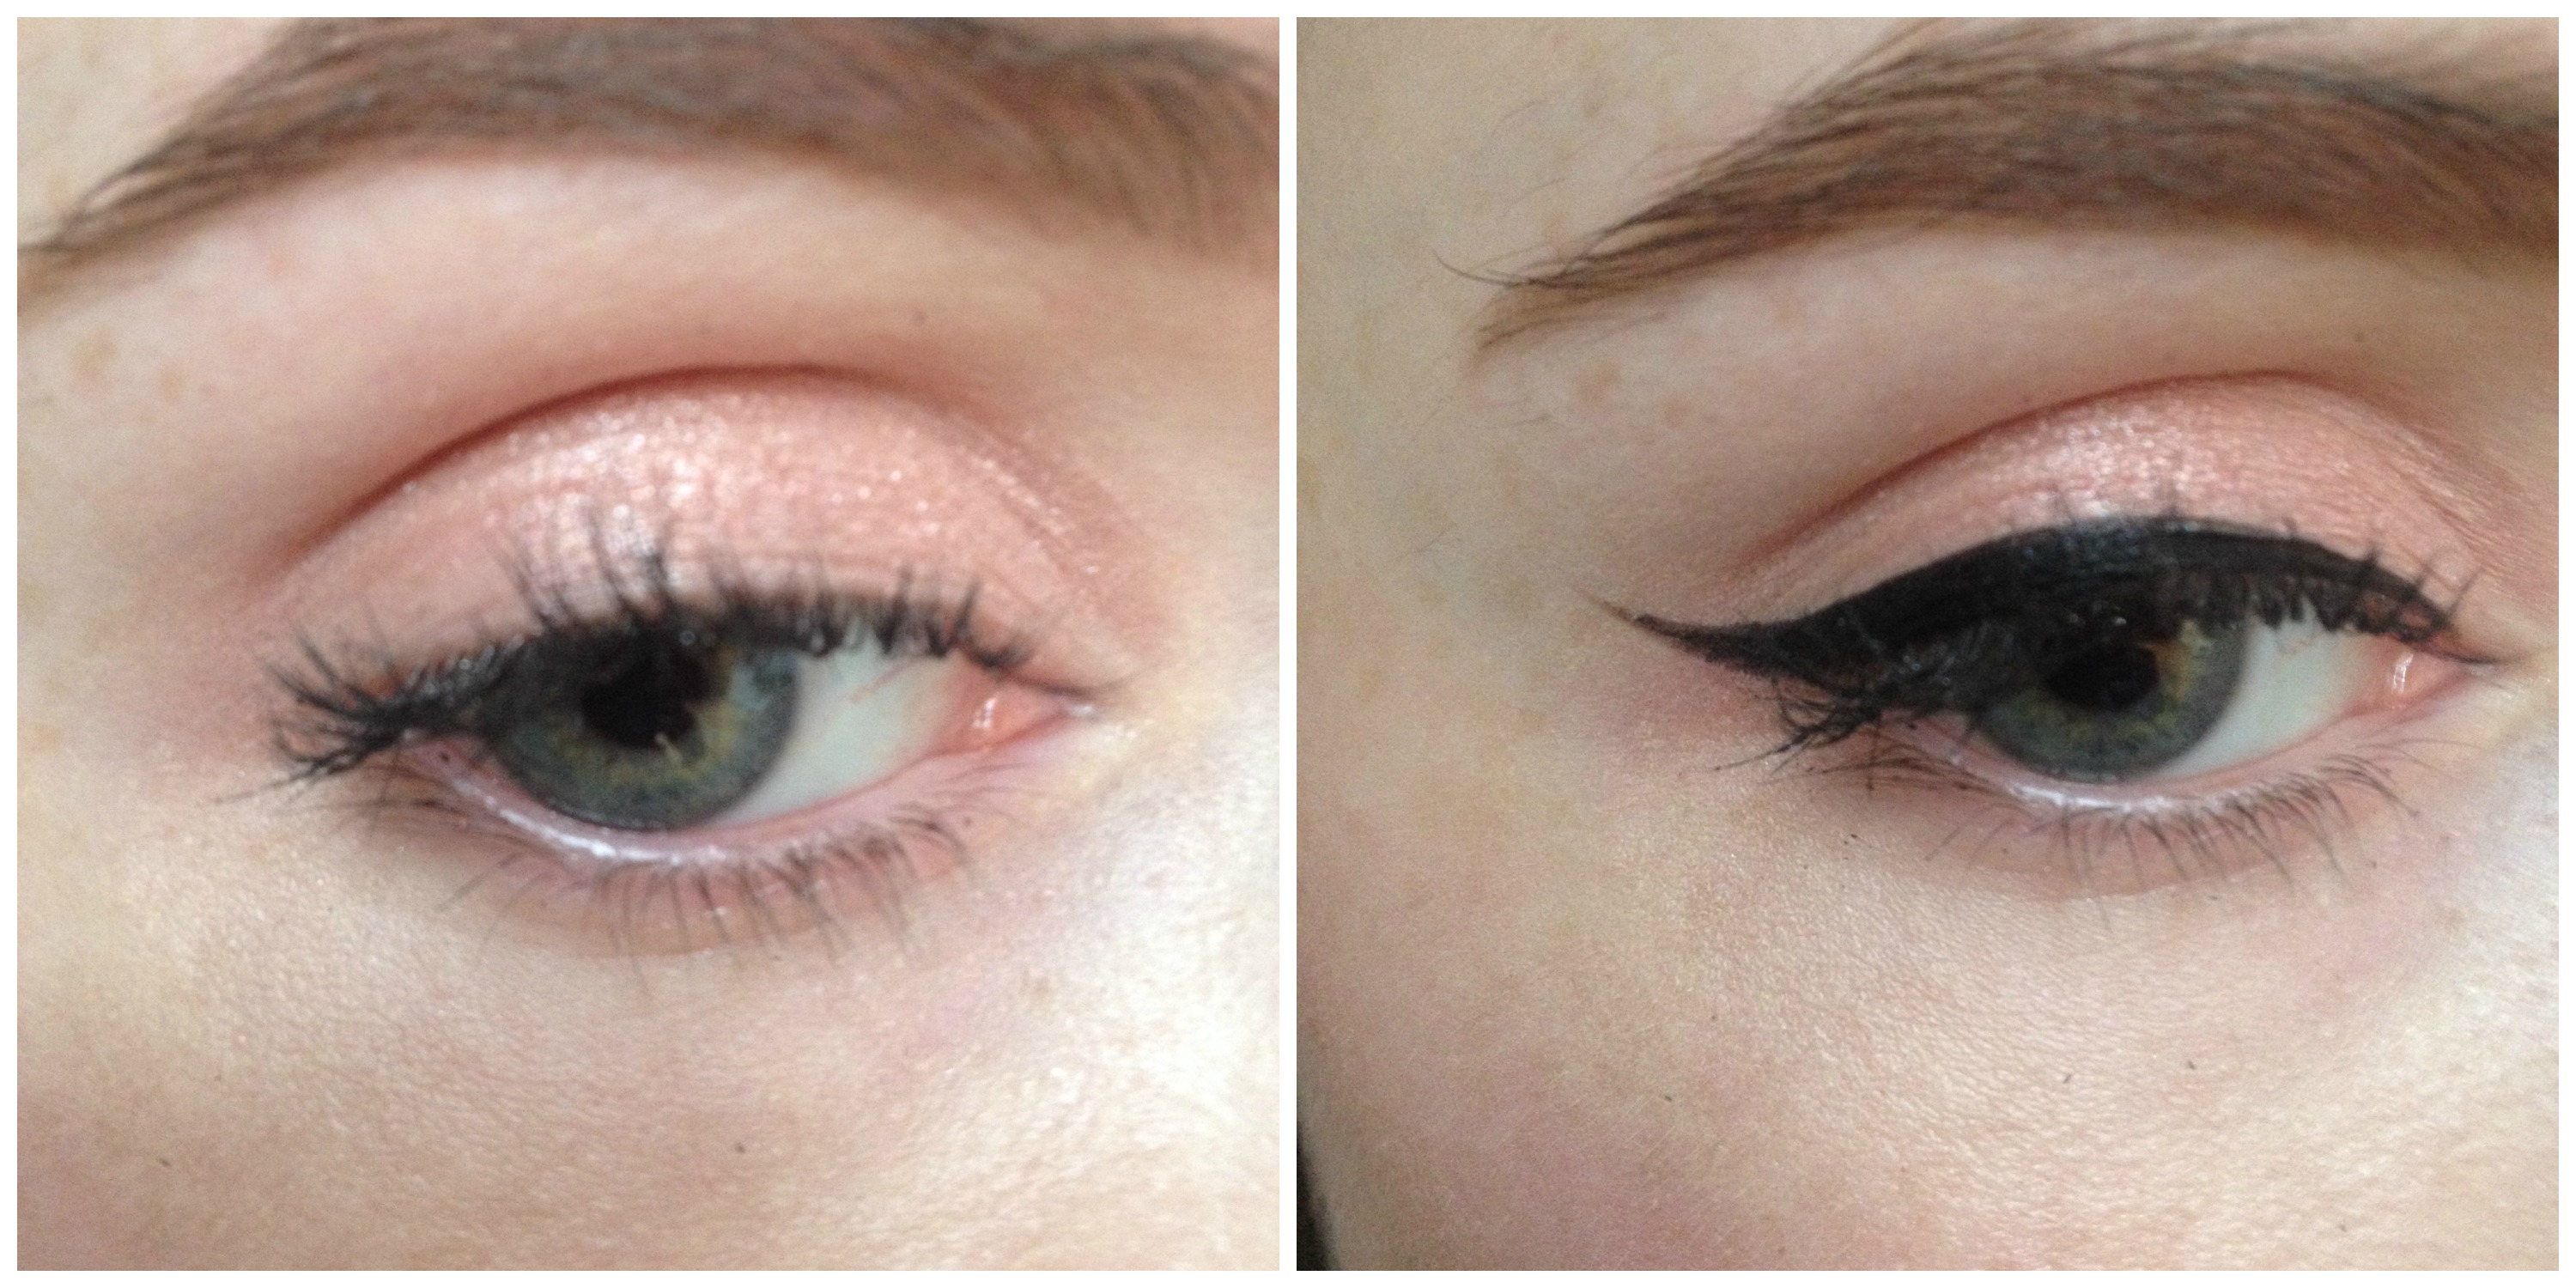
Step One
- Your base is important with a full-on look like this, so I'm using Rimmel's Lasting Finish Nude Foundation in Porcelain. It's the perfect shade for my pale skin and its buildable without looking masky.
- I've filled my brows in with Maybelline's Brow Satin brow pencil in Medium Brown. I haven't gone too heavy with the brow pencil; this look has strong eyes and strong lips, so brows need to be more understated.
- For eyes. I'm using the rose gold shade from Sleek's Original Eye Palette. I'm really impressed by its opaque finish and wet-look shimmer. Pat it all over the lid with a flat shadow brush.
- Next, I'm switching steps a little. I'd usually contour the eye now, but to ensure a perfect shape, I'm lining the eye first. Trust me, it'll work out!
- Grab the black eyeliner you're most confident using and create a cat eye flick. If you find cat eyes tough, this post might help you. Aim for a lengthened eye by drawing the flick out rather than up when you reach the outer corner of the eye.
Step Two
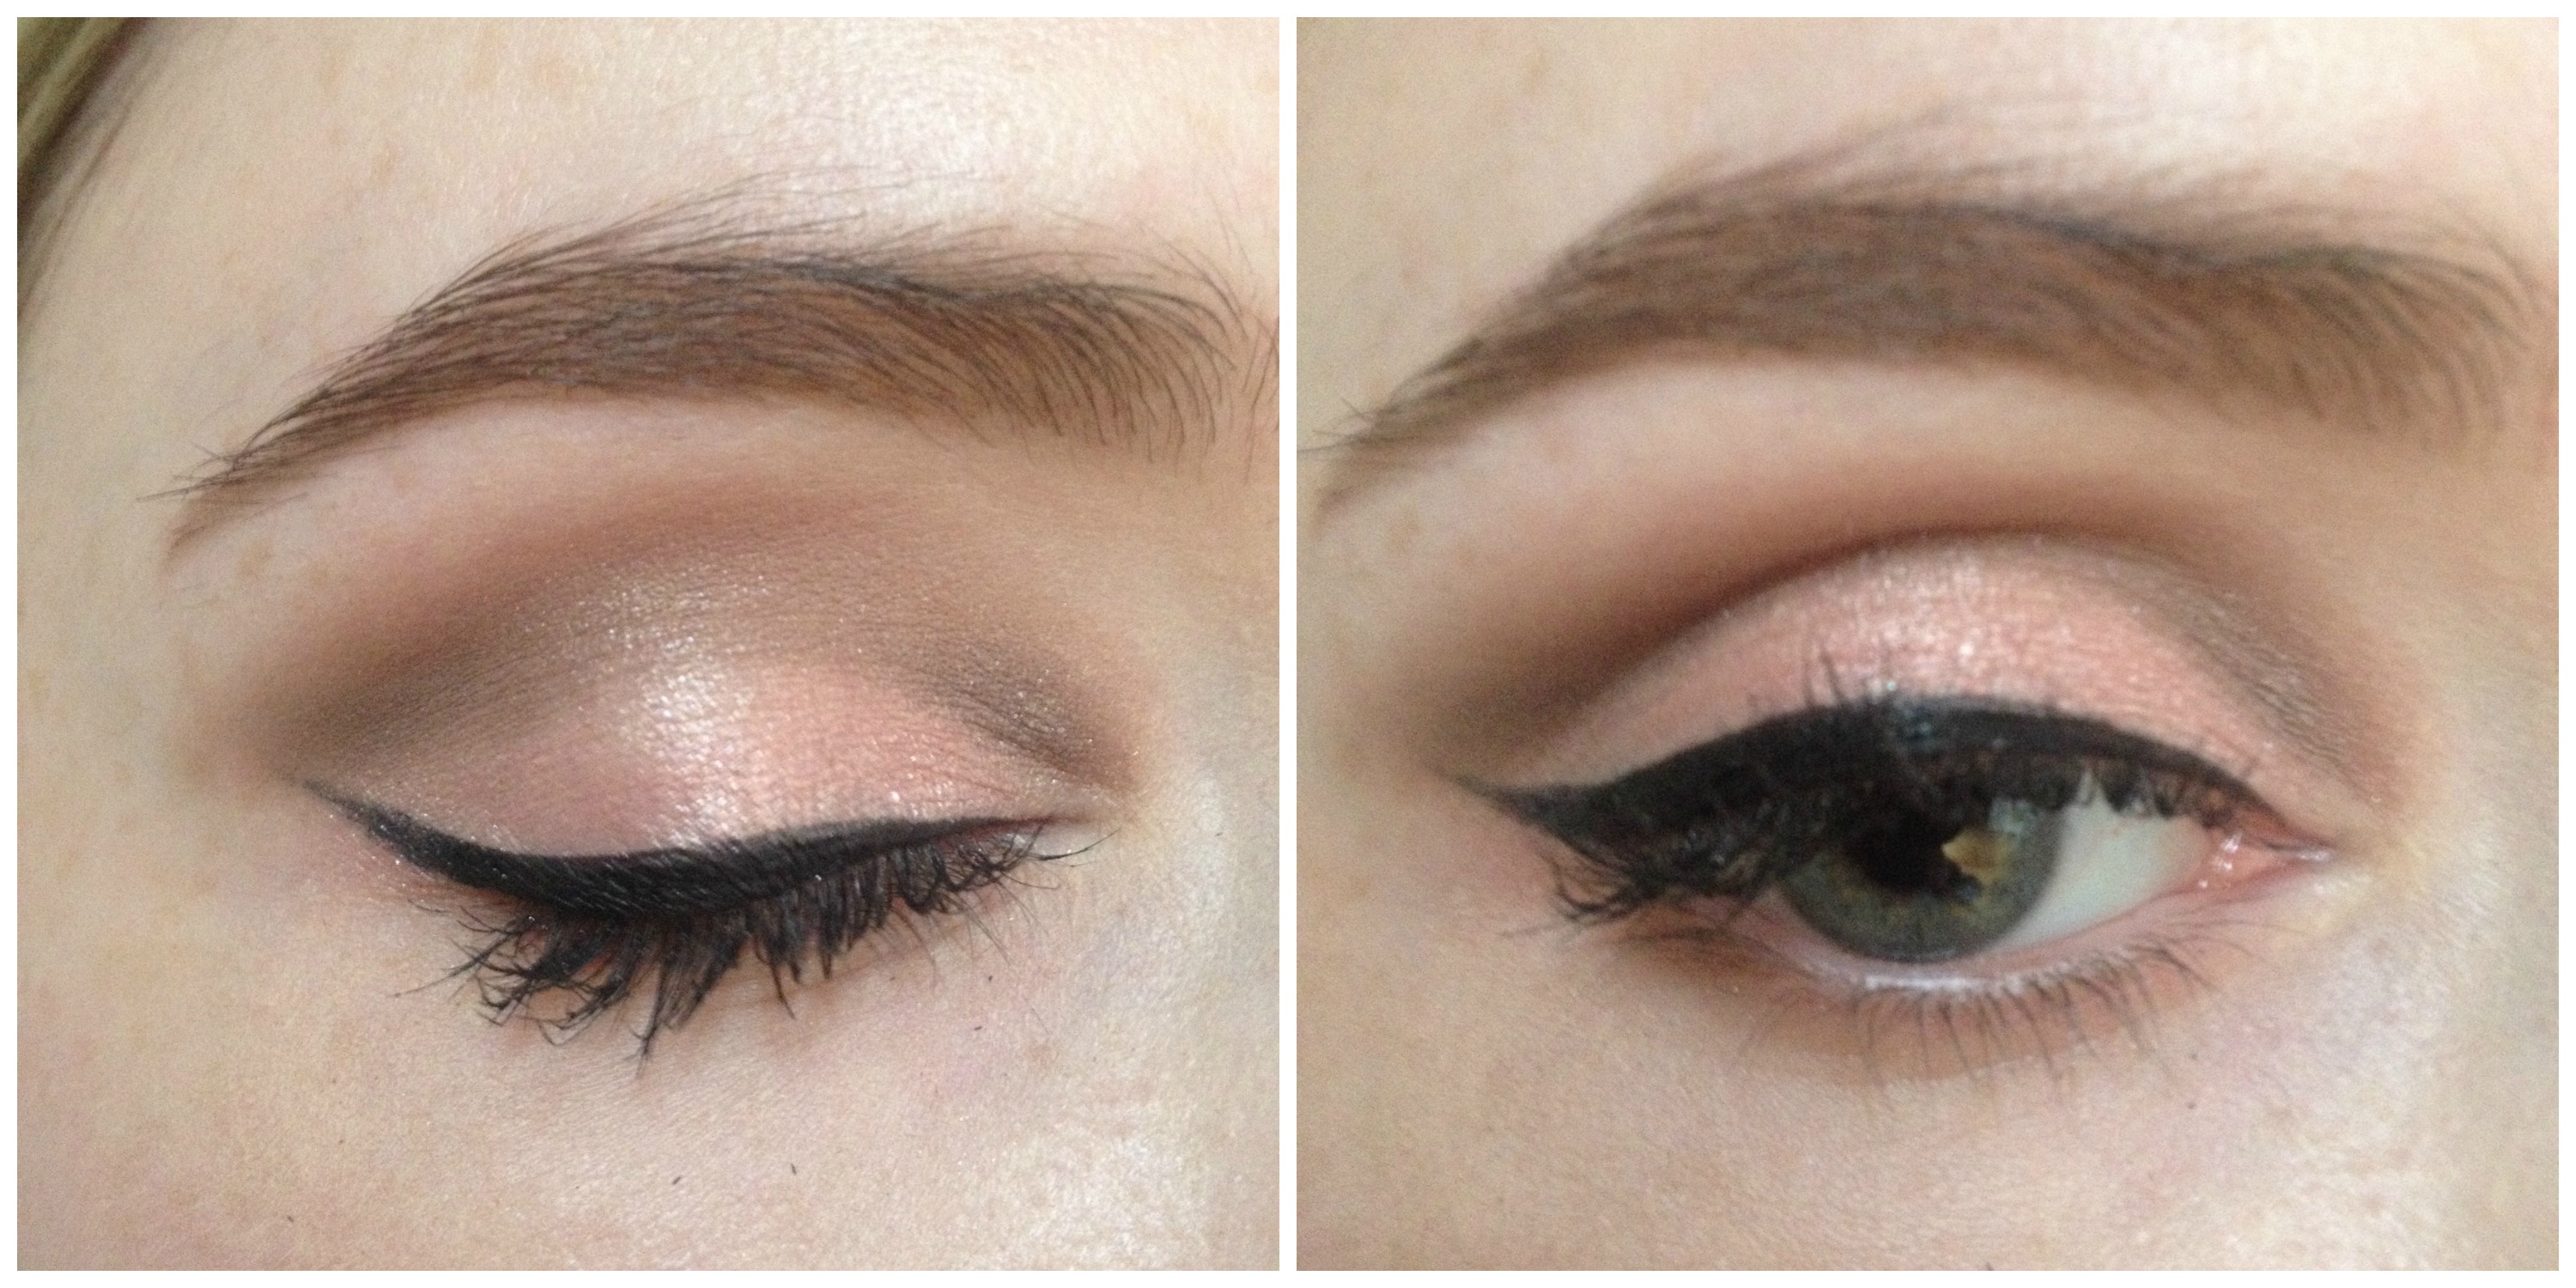
- Next, grab a deep brown matte shadow. I'm using Clarins Ombre Matte in Earth. I'm applying it along the crease of my eye with a blender brush from the inner corner, and bringing it all the way out to meet the liner flick. This creates a contoured eye with a '60s feel. Though I'm blending the edges so that there aren't any harsh lines, I'm leaving the brown shadow in a line shape so that the pink tone of the lid contrast with the brown shade in the crease.
- Take the brown shadow under the eye as well, all the way along, then apply a couple of generous coats of your favourite volumising mascara! Apply it to both top and bottom lashes - we're not aiming for subtle here!
Advertised
Step Four
- Before applying blush and contour, I'm applying lipstick. This is because the lipstick is seriously amped up. After I've applied it, I'll be better able to tell how much blush and contour will look best.
- Moisturise your lips with your favourite balm. I'm just going for good old Carmex. Next, grab a clean cotton bud and give them a good buff to smooth and prep them for lipstick.
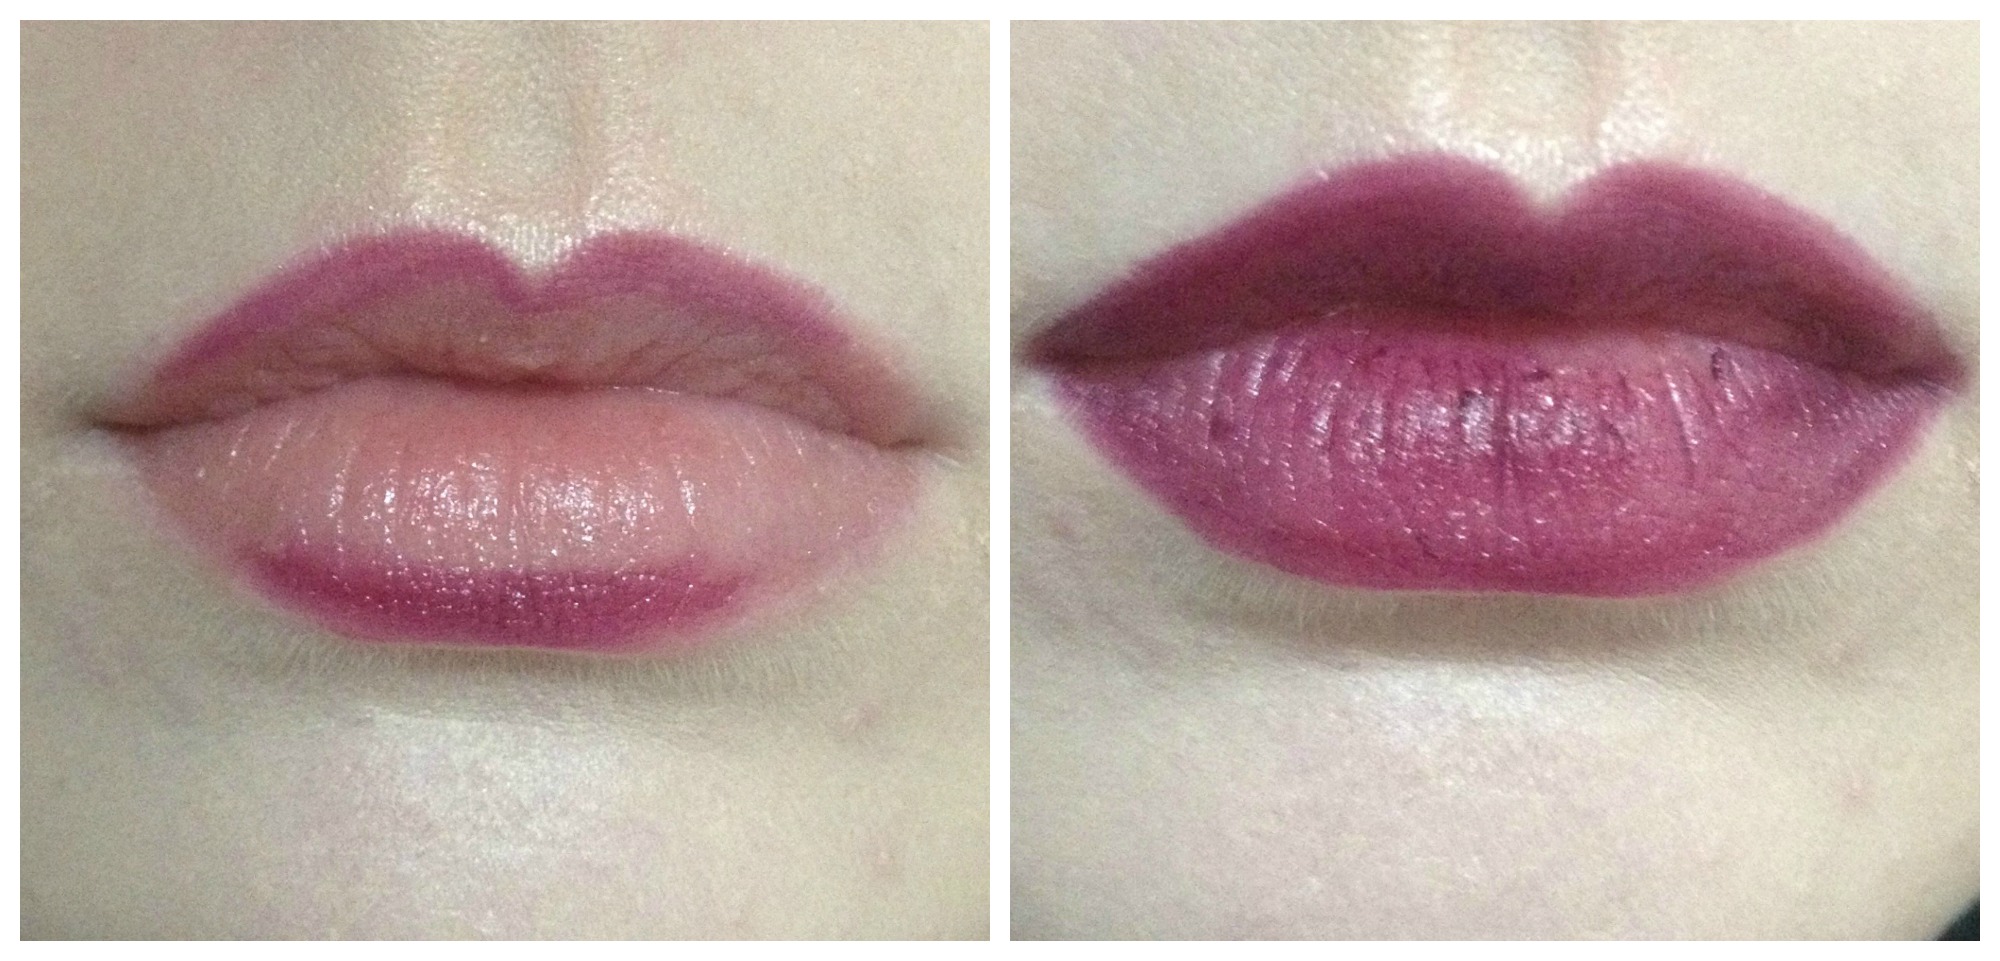
- To make sure your lipstick lasts through till the wee hours, use a lip liner. I'm going for Mac's Current, starting by lining the cupid's bow and centre of the bottom lip. I then work out to the corners of my mouth from the centre. It's the easiest way to ensure even lips! Choose any colour you like, but a deep plum or red will look immediately vampy!
- Fill in your lips with liner. this will give the lipstick something to grip.
- Next, apply your lipstick, blot, then apply again. Several thin layers will last longer than one thick one. I haven't put an image of the lipstick here because everyone is always mesmerised by the colour. It's Mac's iconic Heroine - you'll see it in the final shot! It really makes eyes pop!
Step Five
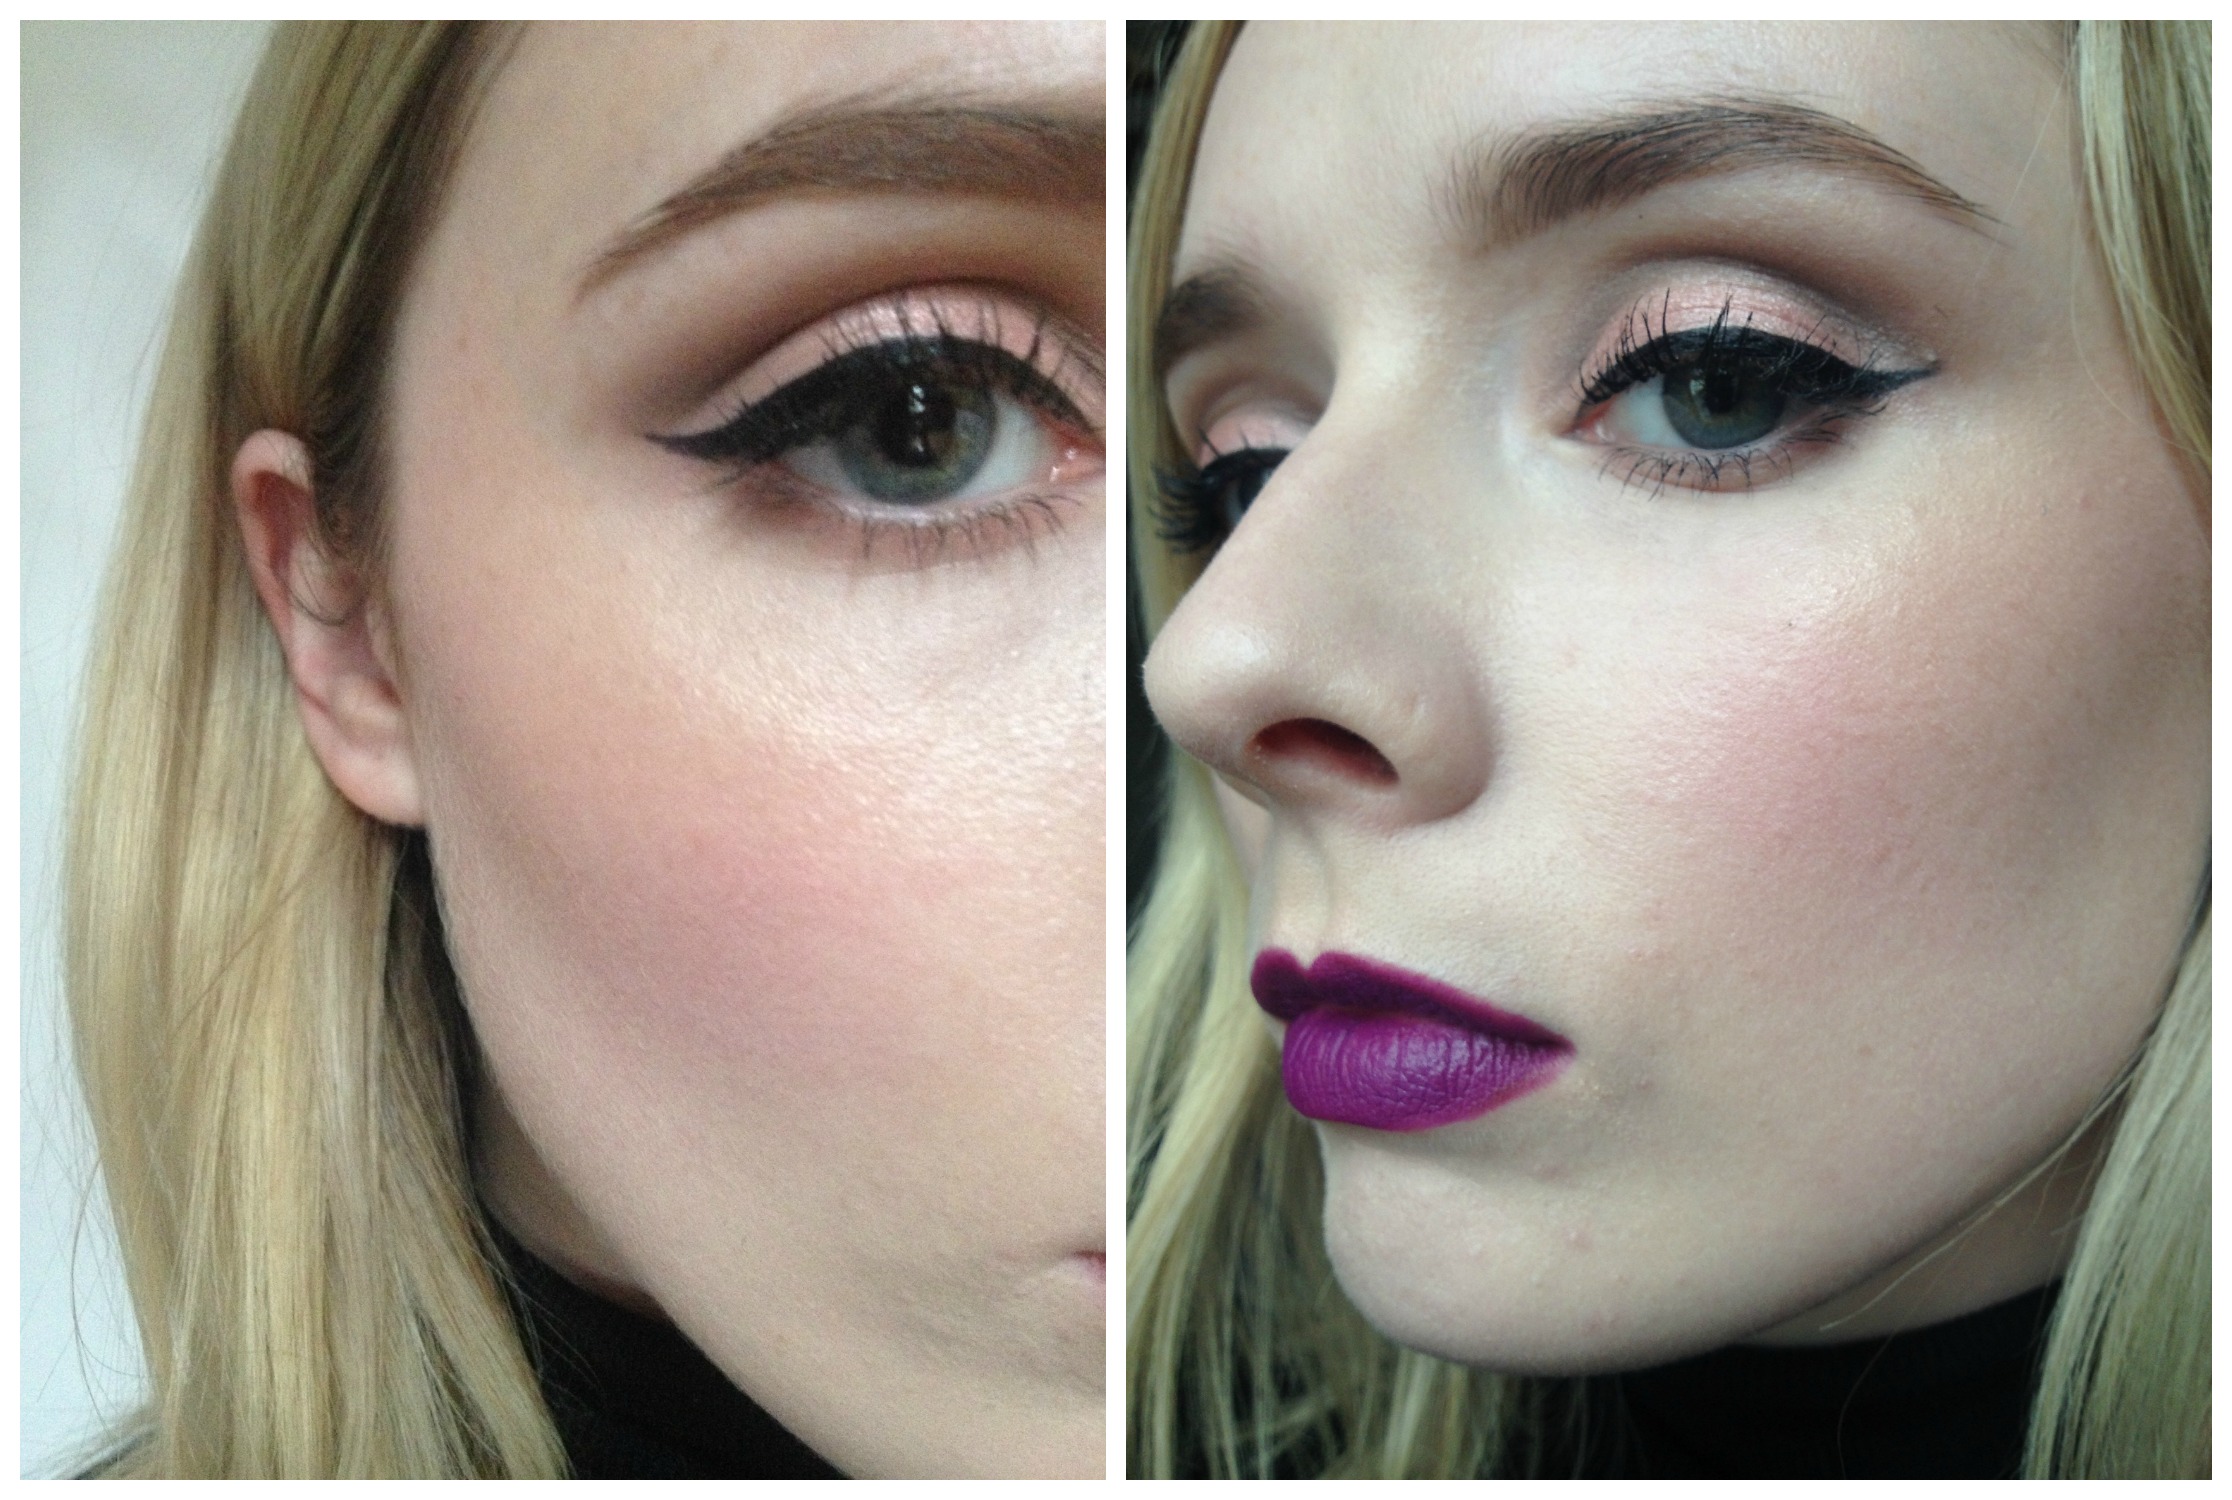
- Next, contour! A vampy look wouldn't be complete without some subtly enhanced cheekbones! I'm applying Mac's matte eyeshadow in Quarry on a fluffy angled brush to the hollow under my cheekbone. If you can't find it, have a poke with your thumb; you'll feel the dip under the skin.
- Next, blush. Only a little is necessary because the look is pretty intense. A soft pink contrasts softly with the lipstick to amp up the look. I'm using Mac's Lip and Cheek colour in Lazy Sunday on the apples of my cheeks.
- The final step is to powder the T Zone to keep the makeup in place all night! I'm using Mac's Studio Fix because it offers a little extra coverage.
Advertised
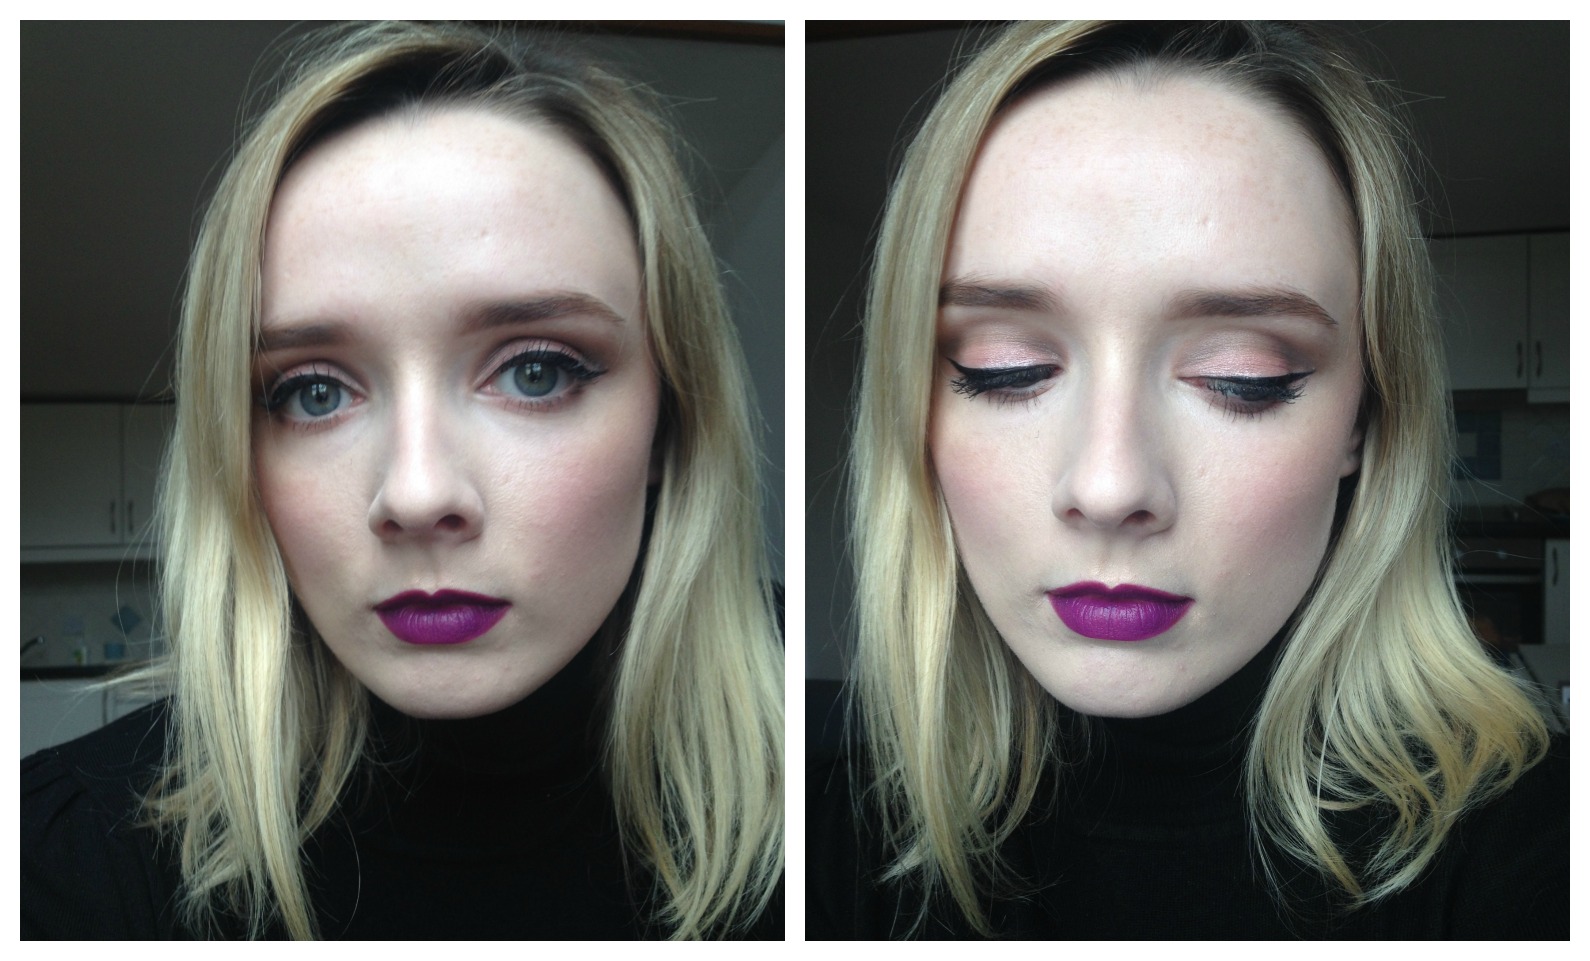
Done! I've teamed it with slightly scruffy hair to keep the whole look a little bit grungy. What do you think? Will you be toting this look tonight? Share your thoughts in the comments and don't forget to tweet us your photos of this look!

