
We're getting back to basics here at Beaut.ie HQ. We love our fancy makeup and complicated techniques, but sometimes you just need to pare it back and work on basic skills. Makeup isn't serious; it's fluffy and fun, but there's always something to learn or a new method to try, and that's why I like it so much.
We're going to use this series to cover the basic techniques of makeup application and choosing which products will work for you. As always, we want to give you what you want to read about, so tell us what you want to see next week in the comments below. Remember - there are no silly questions, requests or suggestions, so join in!
Ah, brows, most of us spent our teens tearing them out of our faces and now we all want them back. We may not exactly want Cara's caterpillar brows, but a fuller and more natural look is certainly a la mode these days. So let's see what we can do to fill out what we've got to create a full but not ridiculous brow. No scouse brows here, thanks.
Firstly, if you haven't got much goin' on naturally, stop tweezing for a while. It can be tough to have all the scrubby undergrowth bristling out all over the place, but have patience Obi Wan. It'll come good in the end. A professional brow shape and tint can really make all the difference.
I like to tint mine with Eyelure brow dye in Brown. It has no red undertone and catches all the fine whitish hairs you can't see with the naked eye to give you more brow. Since I'm a bit lazy about doing it regularly, my brows are bare as a baby's behind at the moment, and you can see that it makes my face look more alien-like, and less structured. ET with anaemia. T'isn't a good look. Add to that the fact that I have a scar through my eyebrow where the hair doesn't grow (I fell and bashed my face as a kid running away from my granny - if you met her you'd get it) and I need some help!
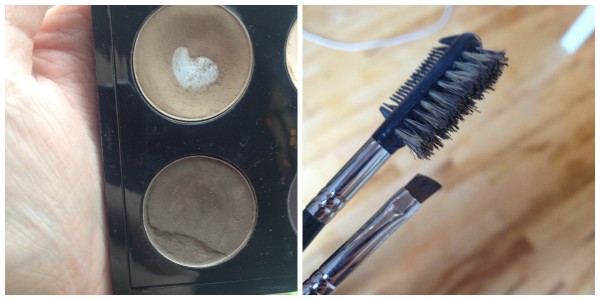 Top: Mac shadow in Omega. Bottom: Mac shadow in Concrete
There are all sorts of fancy brow products on the market, but this is about basic skills, so forget them. Here's what you need to create a natural looking, full brow -
- A good angled liner brush - not too stiff, not too soft; it should give just a little when you push the bristles.
- A brow brush or spoolie - natural hair gives a better finish than synthetic.
- Two matte eyeshadows in your brow colour. I have one light and one deep brown. If you're blonde, you'll need a very light brown/dark blonde shade, and a slightly darker shade. Always stick to matte finishes. Unless your hair is literally black, avoid black altogether. If you're a redhead, try two warm brown shades; one light, one deeper, rather than the cooler brown shades I'm using here.
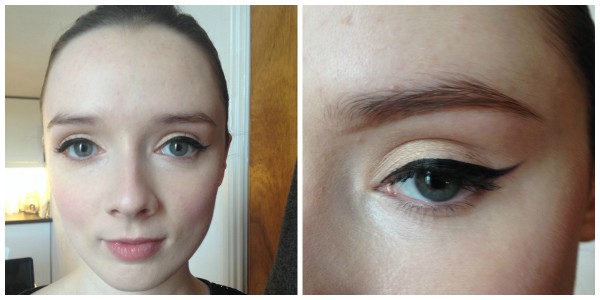 See how imbalanced a full face of makeup looks without some brow powder? I know, phooone hooome...
Advertised
Step One
- Brush your brows through so that the hairs are lying in whatever is the natural direction of their growth. Then, using your angled brush, apply your lighter brown shade along the bottom of the brow, as in the photo. Take your time and create a nice neat line. Don't worry too much - the powder ensures a soft finish. You can't really apply the light colour too heavily, and you can always soften it by brushing through. You can exaggerate a little as I'm doing in the above photo if you want to bump up your brows.
- Fill in the whole brow - the light colour is subtle so it shouldn't look too much.
- Brush the powder through, focussing particularly on the starting point of the brows - you want it to look soft. A harsh square where the brows begin looks weird and very unnatural.
Step Two
- Your brows are not naturally one shade. Like your hair, they contain hairs in several shades. Also, the hair toward the bridge of your nose is naturally sparser than the hair toward the outer edges of your brows, so you'll need a darker shade there to mimic the natural hair density.
- Take the darker shadow (on the same brush) through the outer half of your brow, and if you feel that you need more definition along the underside of your brow, run the darker shade under the brow too.
- Blend with your brush!
- Add more powder or brush the brows out as you prefer and feel free to set them with brow mascara if they get waggly!
- If you find that you've gone a bit wrong, tidy the area wit some liquid concealer on a flat brush.
Done!
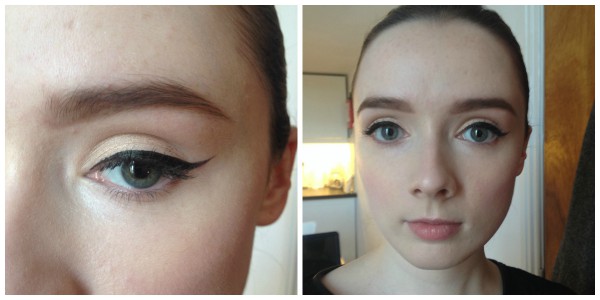
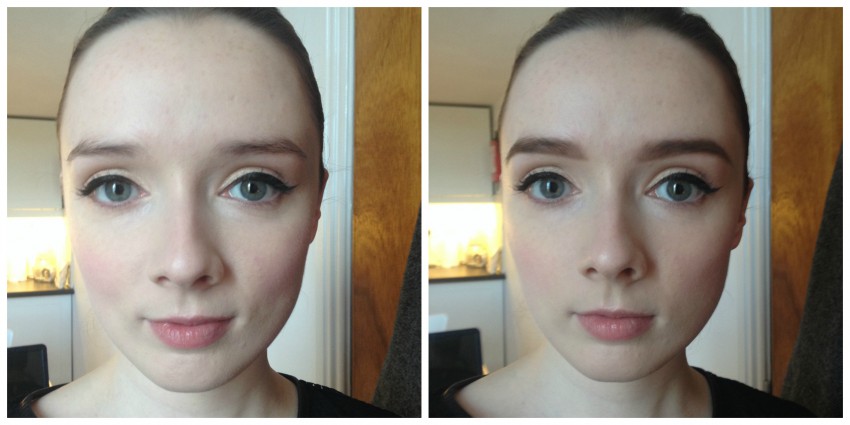 Before and After
The powder has a softer look than pencil or gels, and powder mimics the naturally very slightly patchy look of natural brows while providing soft fullness and definition. Using one shade will never mimic the variety of natural brows. Opt for two and you'll be shocked by the definition they provide!
My brushes are from LA Creative, but you can get good brow brushes from most brands. I do recommend investing - brows are a daily staple!
Advertised
What are your brow tricks? And what do you want to see next week?

